How to use Visual Studio without Docker Desktop to debug a .NET Core application running in a container inside WSL
As the grace period to use Docker Desktop for free is coming to an end, organisations are looking into alternatives to retain much of the convenience Docker Desktop offers, without incurring in the extra costs. One of that convenience is the seamless integration between Visual Studio 2022 (and some previous versions) and docker engine allowing to run and debug applications as naturally as if we were running and debugging them natively on the host. In this post I will show you how I did configure my development environment to run .NET Core applications inside a container running on WSL and debug those applications from Visual Studio running on Windows. It involves some manual setup and configuration, some of them a one-off, and some others every time we want to run and debug our applications.
There is a lot of information out there about how to debug applications running natively in WSL, using Visual Studio; but little and fragmented information about how to debug using Visual Studio (not Visual Studio Code) when the applications are running in a container, in WSL, without having Docker Desktop installed in the host (Windows) machine. This is why I decided to write this post, that hopefully makes it easier for others with similar needs.
This solution works for Windows but could potentially also work for Mac but I haven’t tested it. If you try, leave a comment below to help other readers.
Prerequisites
- WSL2 (if you are using Docker Desktop, more likely you have this already installed)
- Linux distribution on WSL2 (I tested this on Ubuntu 20.04 and Ubuntu 18.04)
- Visual Studio 2022 (should also work with VS 2019 - not tested)
- Some familiarity with
dockeranddocker-composetooling.
Install Docker tools on WSL2 (one-off setup)
Uninstall older versions
sudo apt-get remove docker docker-engine docker.io containerd runc
Set up new repository
sudo apt-get install \
    apt-transport-https \
    ca-certificates \
    curl \
    gnupg \
    lsb-release
curl -fsSL https://download.docker.com/linux/ubuntu/gpg | sudo gpg --dearmor -o /usr/share/keyrings/docker-archive-keyring.gpg
echo \
  "deb [arch=amd64 signed-by=/usr/share/keyrings/docker-archive-keyring.gpg] https://download.docker.com/linux/ubuntu \
  $(lsb_release -cs) stable" | sudo tee /etc/apt/sources.list.d/docker.list > /dev/null
Install Packages
sudo apt update
sudo apt install docker-ce docker-ce-cli containerd.io docker-compose
Configure
sudo usermod -aG docker <your-username-here>
Start Docker Service
sudo service docker start
Check Docker has been successfully installed
docker run hello-world
You should see an output similar to this
Unable to find image 'hello-world:latest' locally
latest: Pulling from library/hello-world
2db29710123e: Pull complete
Digest: sha256:507ecde44b8eb741278274653120c2bf793b174c06ff4eaa672b713b3263477b
Status: Downloaded newer image for hello-world:latest

Hello from Docker!
This message shows that your installation appears to be working correctly.
Enable SSH on WSL2 (one-off setup)
SSH server should come installed by default in your distro, but you might need to tweak it to allow remote connections. This is required to enable remote debugging from Visual Studio.
If you see this error when starting the ssh service
sshd: no hostkeys available -- exiting
Run the following command and try again
sudo ssh-keygen -A
With the ssh service successfully running on Linux, you should now be able to connect to WSL distro via SSH from Windows Powershell, by running following command
ssh <your-username>@<wsl-ip-address>
To find the IP address of your Linux distro running on WSL, run the following command from Powershell
wsl hostname -I
Or following command from Linux
ip addr | grep eth0
Clone demo repository
This step is only required to validate your setup. This is not part of the regular steps you will need to carry on when working on your own projects. You should replace this by your own repository during your regular development workflow.
https://github.com/dotnetting/demo-vs-debug-container-wsl
You will notice the docker-compose.yml file
version: '3.4'

services:
  weatherapi:
    container_name: demo-weatherapi
    image: registry/org/weatherapi
    build:
      context: .
      dockerfile: DemoWebApi/Dockerfile
    ports:
      - '5015:80'
    environment:
      - ASPNETCORE_ENVIRONMENT=Development
      - ASPNETCORE_URLS=http://+:80
Note that local port 5015 in the host (Windows) is mapped to the port 80 inside the container.
And the Dockerfile file inside the DemoWebApi directory, generated by Visual Studio, unmodified.
FROM mcr.microsoft.com/dotnet/aspnet:6.0 AS base
WORKDIR /app
EXPOSE 80

FROM mcr.microsoft.com/dotnet/sdk:6.0 AS build
WORKDIR /src
COPY ["DemoWebApi/DemoWebApi.csproj", "DemoWebApi/"]
RUN dotnet restore "DemoWebApi/DemoWebApi.csproj"
COPY . .
WORKDIR "/src/DemoWebApi"
RUN dotnet build "DemoWebApi.csproj" -c Release -o /app/build

FROM build AS publish
RUN dotnet publish "DemoWebApi.csproj" -c Release -o /app/publish

FROM base AS final
WORKDIR /app
COPY --from=publish /app/publish .
ENTRYPOINT ["dotnet", "DemoWebApi.dll"]
Run container in WSL
In Linux, change the path to the directory where you cloned the repository that contains the docker-compose.yaml file, and run the following command. In my case that was /mnt/c/Users/lester.sanchez/source/repos/DemoWebApi but yours will be different.
docker-compose up
This will build the image from the Dockerfile file and start the container with the application listening on port 80.
If everything goes fine, you should see some logs from the app as following
demo-weatherapi | {"EventId":14,"LogLevel":"Information","Category":"Microsoft.Hosting.Lifetime","Message":"Now listening on: http://[::]:80","State":{"Message":"Now listening on: http://[::]:80","address":"http://[::]:80","{OriginalFormat}":"Now listening on: {address}"}}
To check the application is accessible from the host (Windows), open a browser and navigate to http://localhost:5015/swagger/. As port 5015 is mapped to port 80 inside the container, the application should receive the request and you should see the Swagger UI. You can now send a request to the WeatherForcast endpoint using swagger and should get a successful response back from the app.
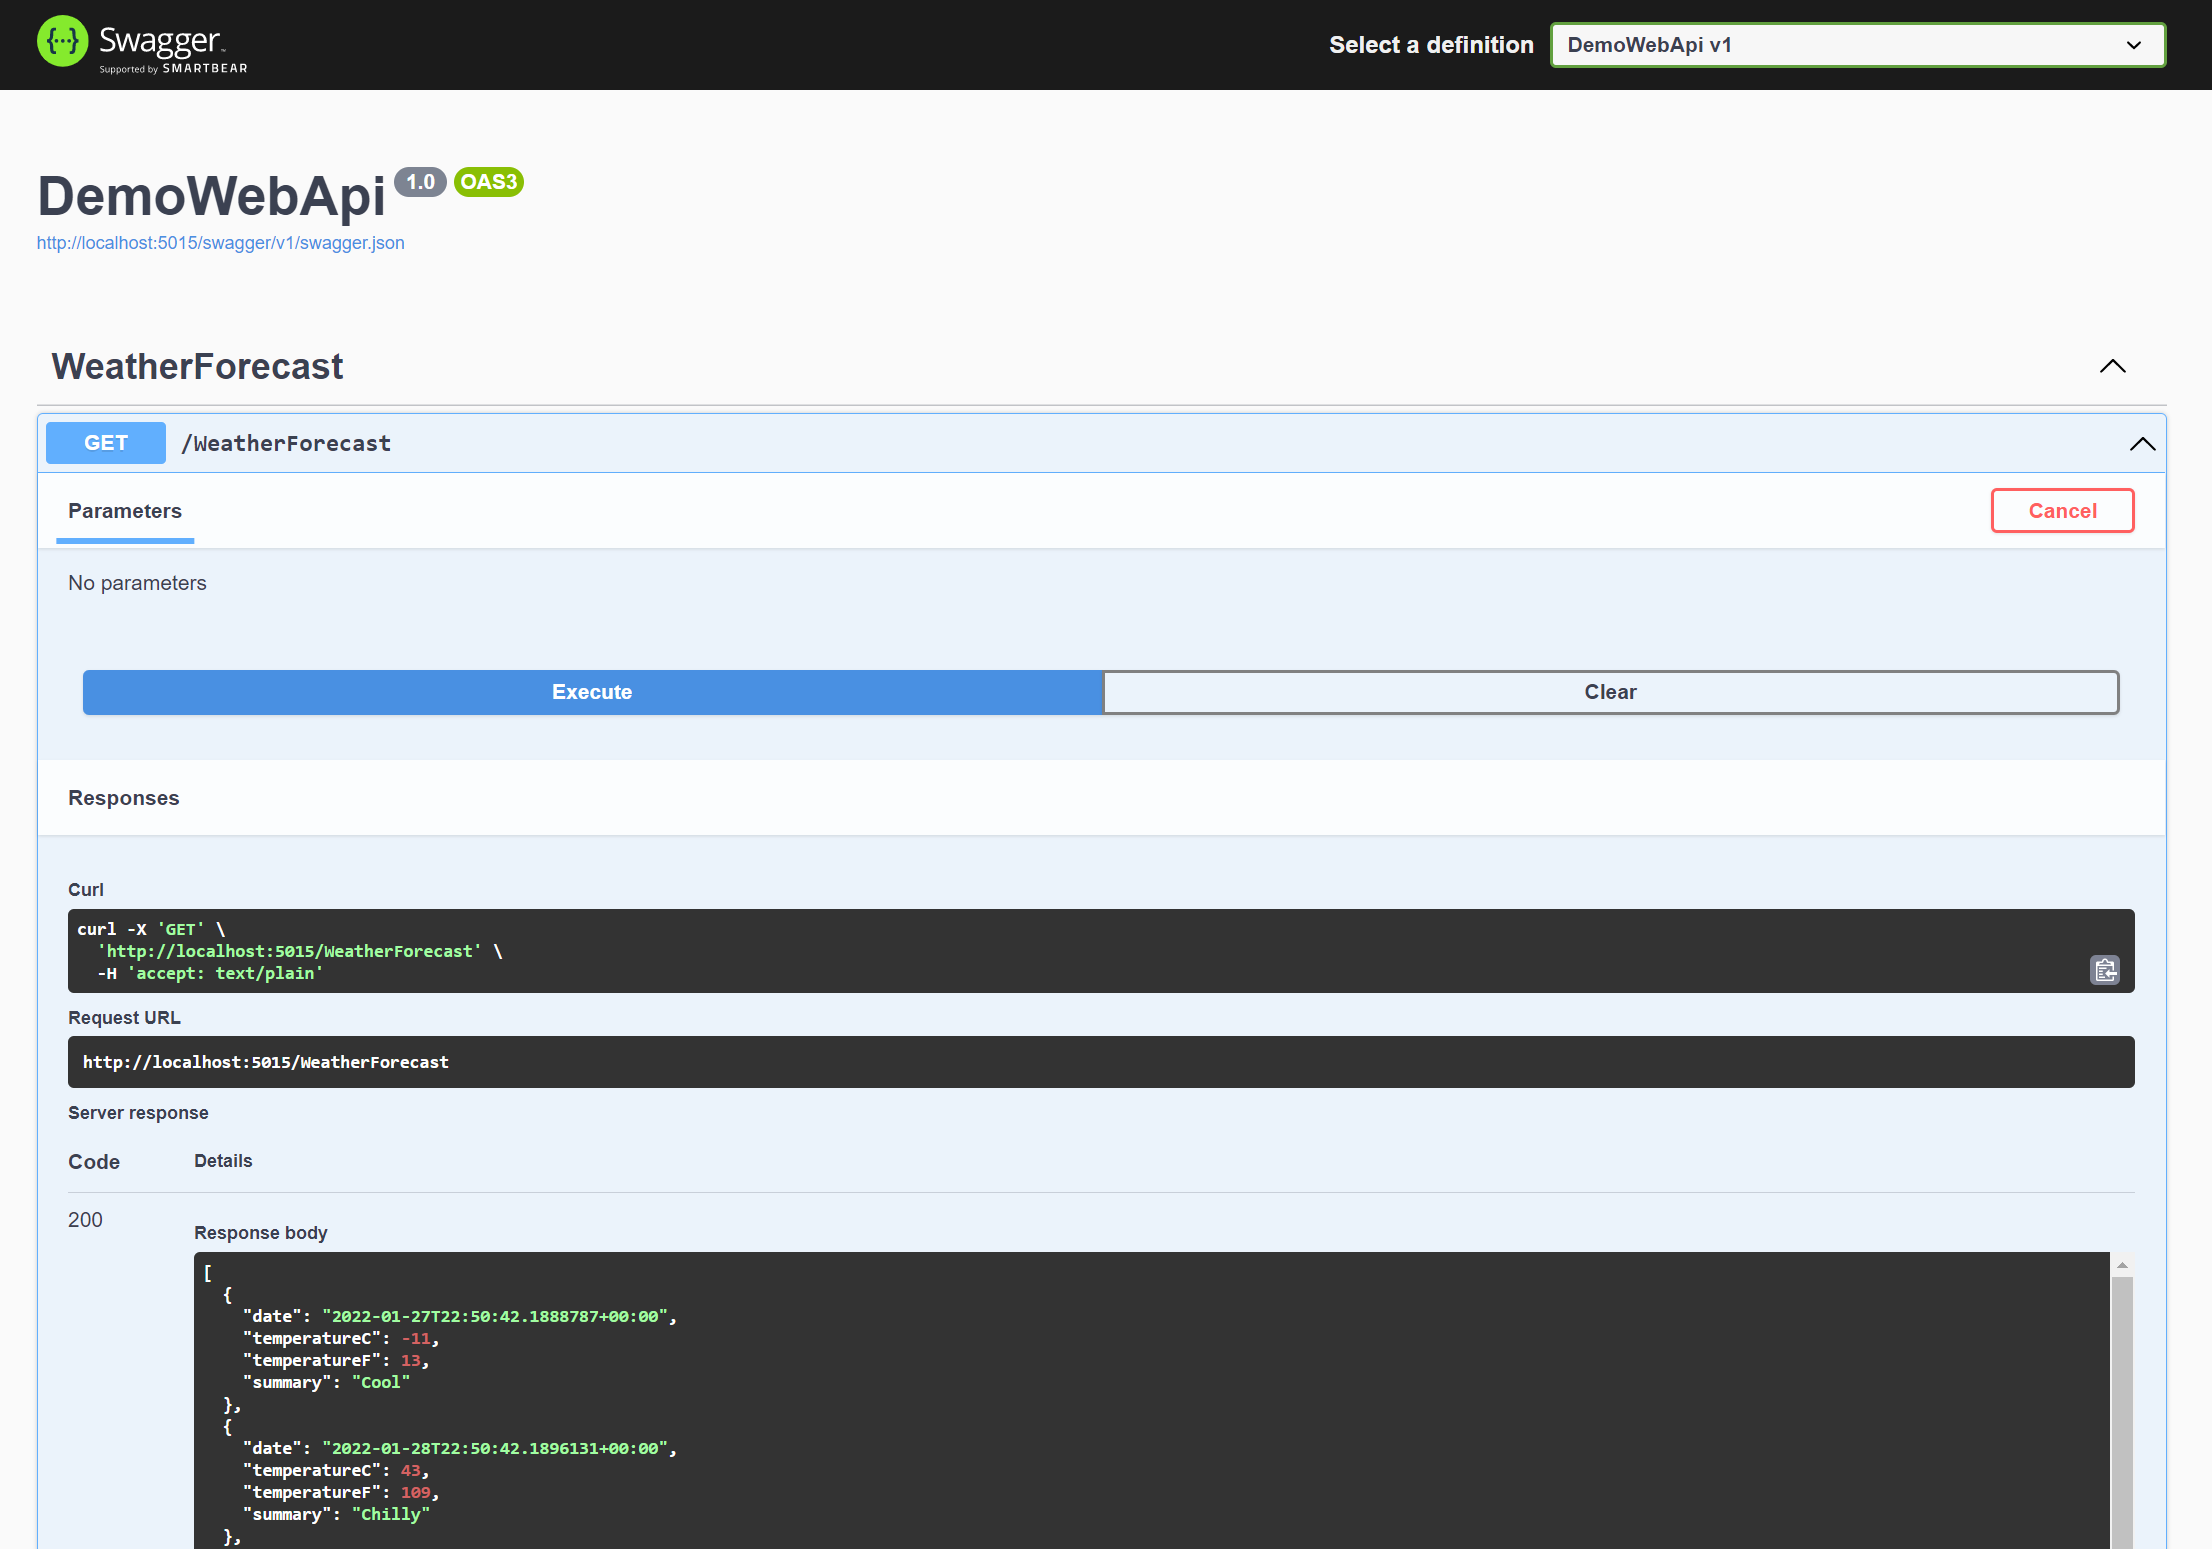
Running the app on port
443(HTTPS/SSL) is out of the scope of this article and it would require configuring and trusting the dotnet self-signed certificate.
Attach Debugger to the running container
Allow Visual Studio to load debug symbols (one-off setup)
Disable following option to allow Visual Studio to load debug symbols for your app running in a container
Tools > Options > Debug > Just My Code
Make sure container is running
Check the container(s) with the apps to be debugged are running in WSL. You can check this by running this command
docker ps
And should see an output including the name of your container(s); using the example code in this post, that should be demo-weatherapi.
Attach debugger to container
Open the solution in Visual Studio; do not try to run or debug via F5 or the green arrow, it won’t work this way; your application is already running in WSL, as a container.
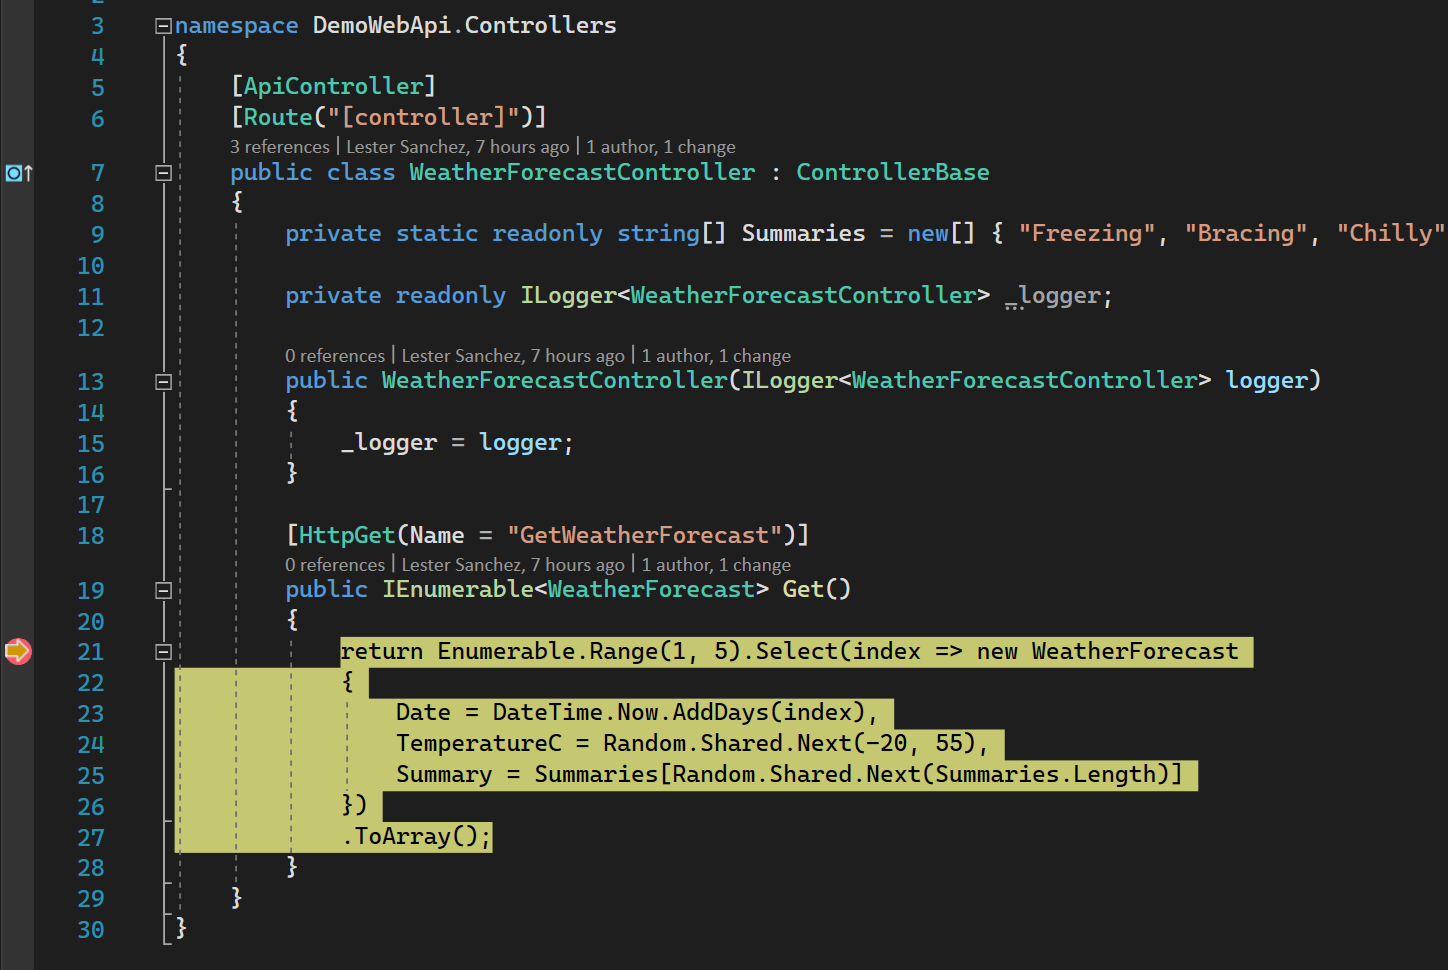
Set a breakpoint in the code where you want the execution to stop, in this example this is in the
WeatherForecastcontroller.Go to
Debug > Attach to process...In the
Connection typedropdown, selectDocker (Linux Container)
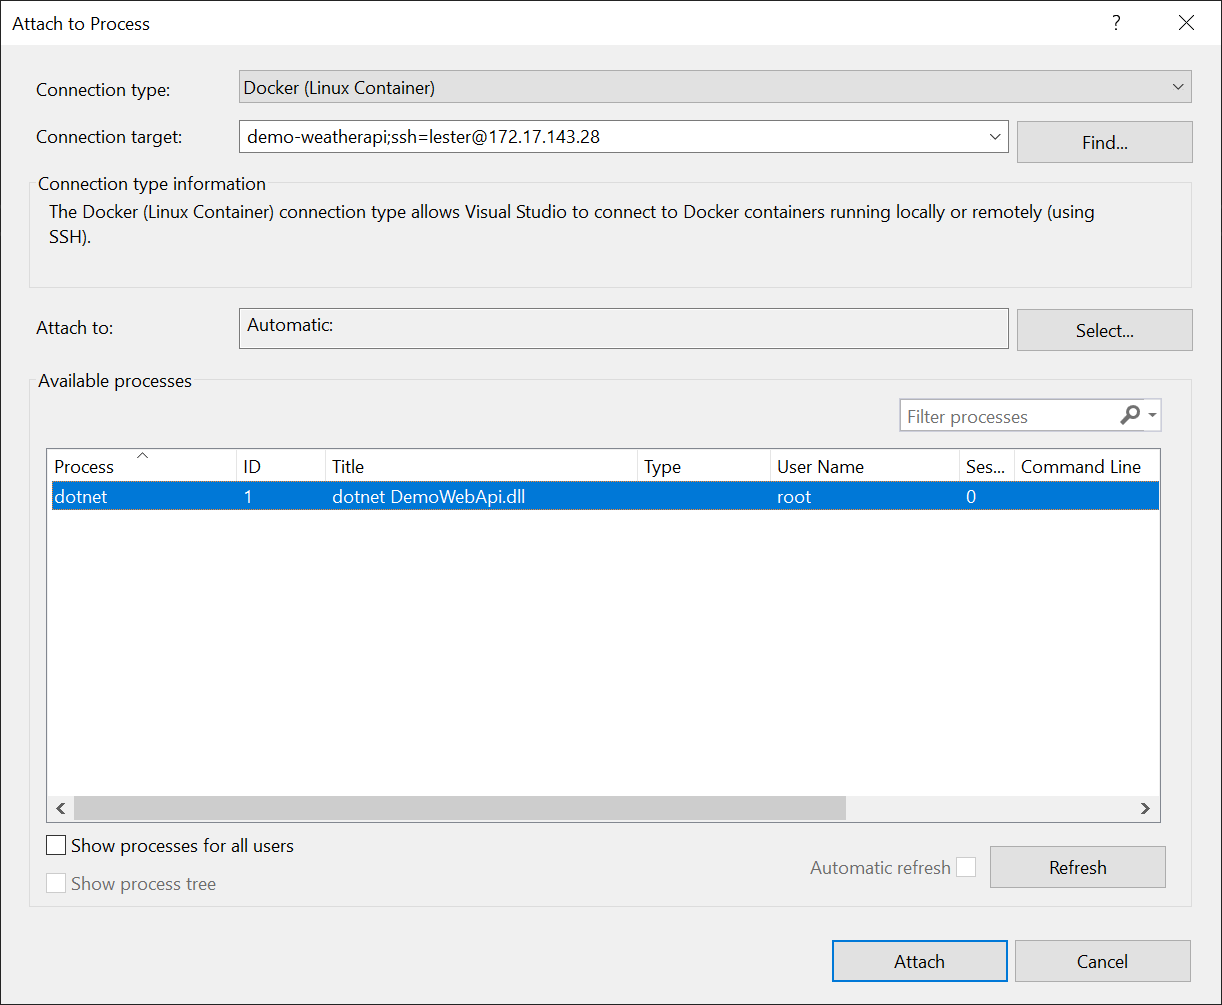
- In the
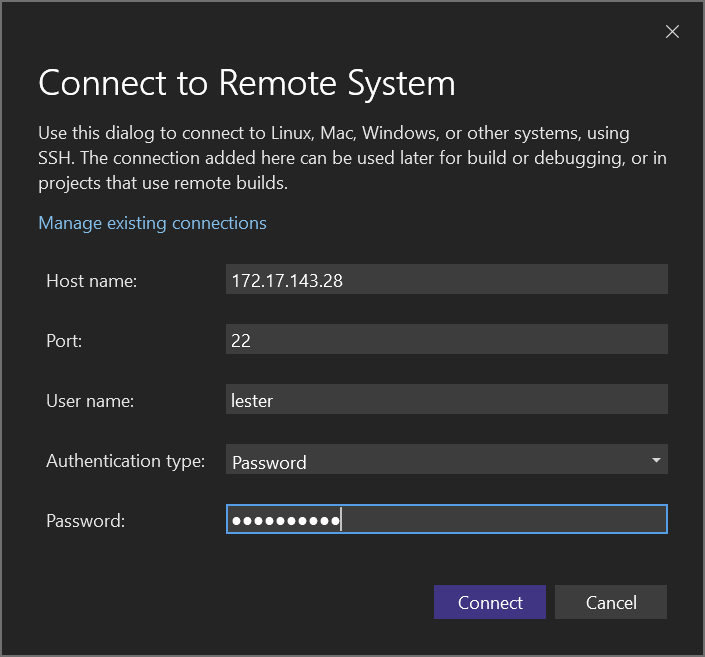
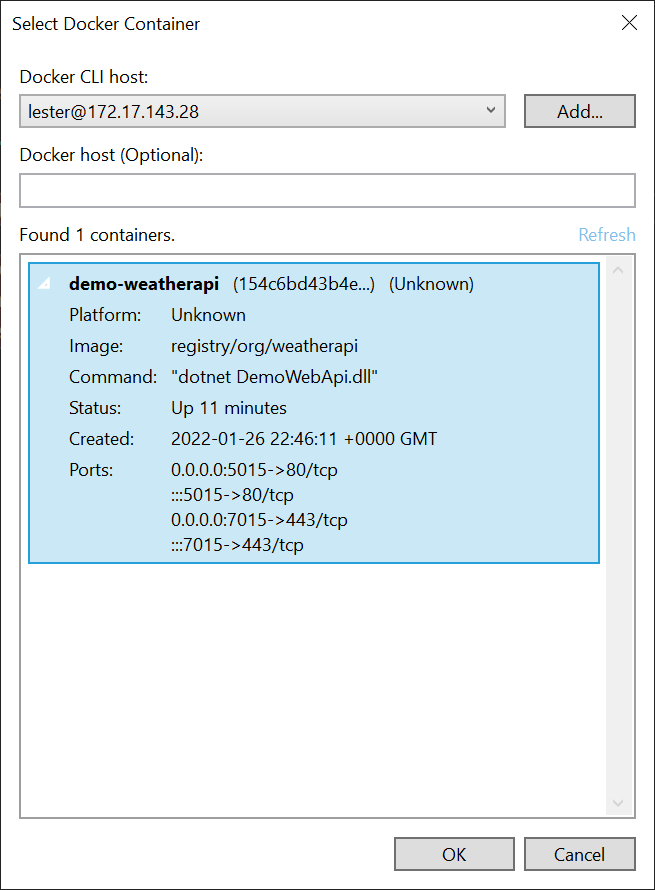
Connection target, select the container you want to debug, and jump to step 7. If not there, click theFindbutton, and then selectDocker CLI hostwhere your container is running. If not in that list, clickAdd...and enter your WSL distro details to connect viassh.
- Select container to debug, in our case
demo-weatherapi
- Click
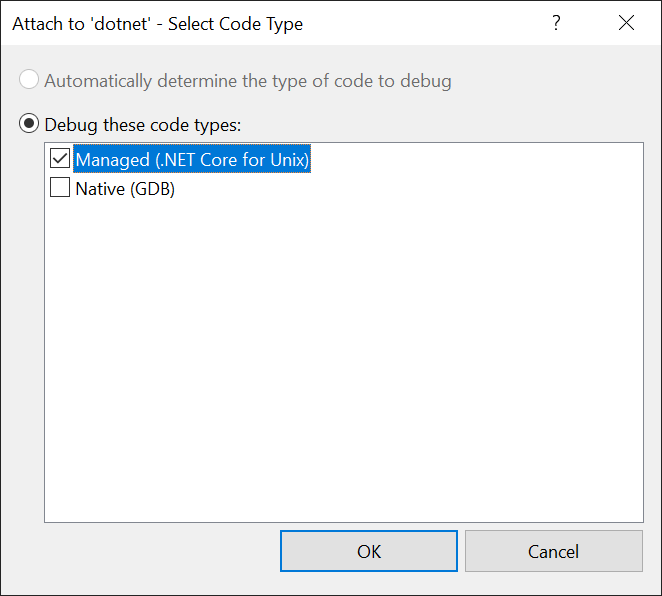
Attachand selectManagedcode type when asked
Send a request via Swagger (or any other tool) to the
WeatherForecastGET endpoint, in our casehttp://localhost:5015/WeatherForecast.Execution should stop at the breakpoint
You will need to set up a new ssh connection in Visual Studio, when attaching to process, every time you restart your WSL distro, as a new IP address will be assigned every time it starts.
Uninstall Docker Desktop
If you are happy with the manual process described here and find it compatible with your development workflow, you should now uninstall Docker Desktop, as it is no longer needed. You can now rely on docker installed on the WSL distribution for all your local development and testing needs.
Summary
Docker Desktop provides an undeniable convenience, at a price, for teams (personal usage remains free at the time of writing this post). If your team can afford it, and it brings value to your development workflow, you should probably pay for the licence.
In summary, these are the steps you need to follow every time you need to run and debug an application running in a container in WSL.
- Log into your WSL distro.
- Make sure
sshanddockerservices are running. - Change the path to the directory that contains your
docker-compose.yamlfile. - Run
docker-compose up -dto bring all the containers up. The-dflag is optional, in case you want to the get back the bash prompt, it means dettached mode. - (Optional) If your container is a Web App or API, open a browser in Windows to check you can access it.
- In Windows, open your project in Visual Studio (do not try to run the project from VS, it won’t work).
- In Visual Studio, go to
Debug > Attach to process...and attach the debuger to the container running your application. You may need to setup a new SSH connection every time you restart you WSL distro, as the IP can change. - Use your applications, the execution should stop at the breakpoints you set.
- When you are done, run
docker-compose downin WSL, to tear down the container(s).
This post only shows the basic minimum configuration and steps required to run and debug containers in WSL from Visual Studio without Docker Desktop. If your use case is more complex than the one presented here, you may need to do additional configuration and steps to this process; or it may be not suitable for your team altogether.
Keep dotnetting…
